Anno 1800 Modding
Anno 1800 Modding
 Version 2.0 ist endlich da! Das wichtigste:
 Version 2.0 is out! Most important changes:
Introduction
What is Modding?
Little Boxes - Malvina Reynolds (1962)
As modding Anno 1800 getting more popular, more people report having various issues, be it mods not working correctly, general misconceptions on how to set it up or even wanting to ajust an existing mod to their individual needs and style of play. Without having a common hub gathering all the knowledge needed where people can go to to inform themselves players getting more and more overwhelmed and trying to seek help from other on various social platforms usually having trouble to find the specific information they need. My goal with this project at this point will be trying to provide a comprehensive first contact point if you are not familiar with the topic yet, but want to know more about it. It should help you to decide whether you want to take this step and use mods, or if you have problems using them. It should also help you to understand mods and modders better, because you even might have some ideas modifying Anno 1800 yourself.
Modding stems from "modify" and in our case means changing the game files from Anno 1800.
Mods are single modding projects. In most cases, modding is not (actively) supported by development studios; this is also true for Anno. Modding is not supported by Ubisoft, but it is tolerated. Users are not getting banned for using mods; there is even a category for it on the official forums Ubisoft-Forum , even if there is not so much going on sadly.
Mod-users usually have a harder time with problems, because the error can also be caused by mods themselves (see Troubleshooting section).
Please keep in mind:
When you are modding your gamefiles you won't get official support from Ubisoft if you have problem with your game - act on your own risk!
If you have problems with a mod you downloaded somewhere you have to look for yourself, where the problem lies, if the modder brings an update or if you can get rid of the problem in another way or fix it yourself. Modders do not guarantee any support for their mods, but from experience they are willing to help you if you take initiative by contacting them or by reporting issues with their mods.

Should I mod Anno 1800?
Well, there are some controversial opinions regarding this topic. If you would ask someone from the official support team, you would probably get the clear answer: No, just for legal reasons.
But the devs like the creativity of the modders and appreciate their engagement in the community despite Ubisofts official guidelines, so they would never act on a player utilizing mods in their game.
Even the community itself is not quite so unanimous about that. Modding is usually accepted by the users, even if ModUsers like to be sneered at. But there are also some who think that modding is basically a reprehensible act of cheating, and want the player to cleary declare if they modded their game when posting publicly. But especially since Anno 1800 there is also the other extreme with comments like "Without modding 1800 is not playable at all".
With mods you can personalize your game. You can add new buildings and create a decorative paradise; you can also make the game easier or harder for yourself (ok most people want it to make easier, never heard of a mod that made stuff harder to do up until today ^^).
Most modders have the decency to try to keep a certain balance despite their adjustments to the game. This can be a massive enrichment for the gaming experience. But even the so frowned upon "CheatMods", which consciously override the balancing seem to have a right to exist, after all there are users who want to use them.
And isn't this the most important in the end: That as many people as possible play Anno with pleasure, so that a following up titel in the series is all the more guaranteed to be made? At least I think it is.
What is Cheating?
Cheating comes from "to cheat" and means to scam, or also to trick someone.
In earlier titles of the Anno series, islands could be given certain names for cheating. Example: If you renamed your island "BonanzaCreek" in 1701, you got +100.000 coins to you credit limit. The origin of cheats are certain console commands used video game development by the programmers, so that the devs could test stuff out to be more time efficient. Over multiple different ways such cheats leaked then into the player community, spread little by little (since the existance of internet a bit faster than in previous times) and you were usualy able to find a list of them in every good gaming magazin.
In 1800, cheating for users is mostly done via mods.
So-called cheat mods (often called 'trainers') help the players to overcome certain hurdles, among other things by providing the player with money, goods or items, or making access to them much easier. Some game mechanics are even deactivated or their negative effects nullified completely.
While modding is widely accepted, cheating is usually frowned upon, even by many modders. The line where cheating starts is very slim and sometimes not clearly defined. For example, adding decoration objects is definitely not one of them; at least in my opinion. But it might be different, if you get hundreds of items into your Kontor for basically free by modding when building a single ship, just to take up a past example.
If you cheat while programming and testing game mechanics or self created mods, or while preparing a setup to make an purely informational video or stream, just to save time or to create certain situations, you would never think of calling yourself or such a person a cheater. But if you do that in a competitive setting where you try to claim an achievment or victory over others, I think we are more or less in agreement that you are 'cheating'
So whether someone is a 'bad cheater' depends on the context, because even users of cheat mods don't always use them to cheat.
Utilisation de Mods
How to use Mods in Anno 1800?
English manual as video by Takarazuka
Thanks to resourceful users like meow this is not difficult at all. There are just a few simple steps:
- Download the Mod Loader (in the latest version) from github
- Download the mods you are interested in. Sources include Nexusmods or Reddit.
You can also combine mods from different sources. - Unpack the modloader folder and copy the two files in the installation location of Anno 1800 to the folder Anno 1800\Bin\Win64\
➔ Confirm that you really want to copy the files there when the window pops up. - In the Anno 1800 folder create a subfolder named "mods" (so quasi Anno 1800\mods\)
- Extract the downloaded mods into the folder "mods" you just created.
Consider that there are a few mod projects which put several different versions of their mod in the folder; you have to choose the one you want manually. At the end there must always be the following structure: Anno 1800\mods\MODPROJECT\data\...
All mods in this folder that have no "-" at the beginning of the folder name will now be automatically inserted into the game when you start it.
The other mods, which have a "-" at the beginning (example: -[Gameplay] Cargolimits) are considered deactivated and therefore not loaded. - Start the game, that's it :)
The first time you start the game after changing the mod folder, the start of Anno takes longer, because the mods have to be read in again.
Also, I want to point out, that with modding the system requirements can increase, so the PC could need a little more power. If you like comfort, you should look for a mod manager, which can be helpful for the collection and the deactivation/activation of mods.
Finally here is a picture to clarify how the mod folder should look like: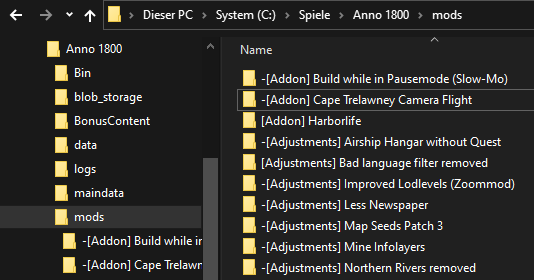
What kind of Mods already exist?
The selection is very diverse. Just one year after the game was released, there were already over 100 individual mods.
There are cheat mods (sometimes called trainers), sandbox modes, decoration and ornaments , everthing you can wish for. There are even new needs, buildings, etc., and the modding community is working on even more. The probably biggest part is the mod collection "Spice it up", which contains about 70 smaller mods, and the mod "New Horizons", which is planned for the beginning of 2021.
It's best to take some time to get an overview first or you can easily search for functions that are important to you. Most mods are published on Nexusmods and/or Reddit. But also the old-established communities, like the Annozone, the Maug project and surely a few others, offer choice.
Can I play with mods in multiplayer?
Yes! But: All participating players (in case of Coop mode all 16 players) have to use exactly the same mods and the same versions.
If you have problems, just copy and send your mod folder to all other players, then it should be exactly the same ;)
In addition, faulty mods can cause problems, even if there is currently no known mod that causes problems in MP.
To avoid this you can deactivate the activated mods one by one until the game starts again without errors. After that you can switch them on one by one again and leave out the troublemaker. If it still does not work properly and no other error can be found, please send a message to the mod creator, so that the error can be investigated and fixed.
How to get rid of the Mods and go back to vanilla Anno 1800?
If you want to play without mods for a short time only, it is sufficient to rename the folder mods. The Mod Loader will not find any mods when starting the game, and the game will start without mods.
If you want to free your game from modding permanently, you have to delete both python35 from the mod loader and replace them with a backup of the original. But you can also make Uplay do this for you. The function can be found under Games => Anno 1800 => Properties and it is called Check files. But you will have to delete the folder "mods" yourself.
.Dépannage
Errors which can occur with Mods
Problems with mods usually occur right at the beginning, if they either were installed incorrectly (see above), or if Anno got a recent patch update. If you encounter problems, it is best to contact the creator of the mod directly. Contact details can be found from where you downloaded the mod. Sometimes they have also pot their prefered ways of contact in a readme.txt or similar in the mod files.
If you encounter problems and don't know where they may have originated, here's a bit of general troubleshooting:
Try different saves. Even a savegame can break sometimes.
If the mod collection is new, see if mods are incompatable with each other. Some mods also need other mods as a base to function properly (usually found on the download page).
Deactivate all mods (just rename the folder "mods") and see if the problem persists. was there an update, and/or test if it also exists if you create a new game to see if it comes from Anno/Uplay itself. (Remember: Modded savegames = no support)
If the Mod Loader doesn't want to run at all, it can help to reinstall Visual C++ (make sure you have the right version), but this is rather unlikely, and Anno usually has a problem too if that is the case. You can find the download here.
More likely causes are other programms like Steam (where you have switch to offline mode) or Epic Game Launcher. In the latter case you have to uninstall the Epic client, and then install/start Anno "normally" via Uplay (no guarantee but it works most of the time).
For general knowledge, the need to exchange information, etc. some modders also have a discord server, which you can join: https://discord.gg/4XQTznE
Errors that can occur with Anno 1800 itself
Most problems with Anno 1800 occur after game updates. Often it helps to let Uplay check the game files, sometimes even 2-3 times. Modder: Make a backup of the Mod Loader ;)
The function can be found in Uplay under Games => Anno 1800 => Properties =>Check files.
With new game versions sometimes the Mod Loader must get an update too to function correctly. Information can be found on the github page, or in the channel #modloadersupport on the modder discord.
If the UI crashes or malfunctions, it helps to switch between DirectX 11 and DirectX 12. You have a seperat option for this in the game settings in Anno 1800 itself, or you have to dip into the files a little:
In the folder C:\Users\XXX\Documents\Anno 1800\config you will find the file engine.ini. Open this file with a text editor (not Word!) (usually right-click => Edit) and change the value at the top of "DeviceType": to "DX11" or "DX12"
Faites le vous-même
How to learn to mod Anno 1800?
The most common and best answer is probably: Look at the documentation of the Mod-Loader and learn from other mods how to use the commands of the Mod Loader.
There is no big tutorial, walkthrough, helloworld or anything else. Simply nobody has done it yet. There are only a handful of modders have enough knowledge to write comprehensive tutorials.
Therefore: Look at the file structure of other mods; which files are needed for what. For text files => have a look. Analyze what the creator of this mod does in which way and what the result is.
And if you are tempted, just change the values of an existing mod and see if ingame comes out what you expect or create your own little mod by copying things from other mods. But: If you copy from others and share the result, be fair credit who inspired you and wrote the original.
What it takes to write a mod for Anno 1800
First of all: You need a desire to create. If you don't know what you want to have differently, you can't change it ;)
For this reason I have been mainly passive in modding and hardly used the knowledge I picked up. Vanilla is still enough for me at the moment.
A basic understanding of programming helps immensely (no matter which direction), but is not absolutely necessary.
The necessary requirements depend strongly on what you want to do. If you want to work on e.g. graphics, you will need external programs. At this point I will keep it a little bit shorter and limit myself to basic stuff.
In my opinion it is recommended to first make sure that you can look into the game files yourself. The game files of Anno are in several archives and can be found in Anno 1800/maindata/ (Example: data0.rda). The RDAExplorer opens the archives and unpacks them where you need them. It doesn't hurt to make a backup.
Download => Start => File => Open (Read Only) => Select Archive => Open => Tools => Extract all => Select location.
Depending on the size of the archive (a few MB up to 12GB) unpacking can take a few minutes.
Attention: Anno starts at data0.rda and goes up numerically. During updates obsolete files will be replaced by new versions from a later rda..
It is therefore recommended to unpack from data0.rda one time at a time. This way you will have the latest version of everything and for future updates and DLCs you only have to check which .rda are new/changed and unpack only these
Most mods work by replacing, deleting or adding new values in the settings of Anno.
Most of these settings can be found in the file assets.xml, which can be found in the unzipped game files under data\config\export\main\asset. Be careful with this file. Before opening, keep in mind that the file is over 100MB of pure text, in over 2 million lines. Not every program can handle files this large. Standard programs like Notepad (editor) or Notepad++ will crash while editing these files, and may even end up in a bootloop when the last opened files are reopened. And also monsters like Dreamweaver have already shot themselves off with it.
I recommend Microsoft Visual Studio code with XML tools as extension.
And if you are on xml in tree structure, XML Tree Editor is able to handle the assets without crashing.
Most graphics for UI etc. can be found as .dds files in the game files. Hardly anyone can do anything with it, but converting is quite easy.
The way I described is only for the basics, where you want to convert the images to be able to assign them. If you like it more professional, or if you want to work with the graphics, you can also automate the conversion via xn Convert or Gimp. If you want to use the images further, there are a few things to consider when converting. But my knowledge is rather incomplete, to put it nicely. You can find more information at the Maug-Project.
That's why I only have the Kellerkind variant for converting the icons to .png, just for the purists and the beginners.
Download "texconv" from mircosoft and save the file in the folder "data" in the game files you unzipped earlier. Next, open the text editor of your choice (again: not Word!) and write the following into it:
FOR /R %%i IN (*.dds) DO (
    texconv -ft png -o "%%i\.." "%%i"
)Save the file in the folder "data" under the name converter.bat (whereby everything before the ".bat" can be freely selected).
If you execute this file now, the Windows Command window opens and in rapid speed the lines rush through.
A .bat, a so called batch, is a small own program you can almost say (since created by yourself: your own small program ^^).
The Batch now goes there and looks in the folder where it is stored (as well as in subfolders inside) for files with the extension .dds. If it found such a file, the batch takes the texconv.exe with the other hand and stuffs the dds-file into it, so that at the end a png recognizable for everyone comes out. You can google the meaning of the parameters if necessary.
You don't need more than that to have a solid basic equipment for your first attempts at walking and comprehension before you take further steps.
Everything about GUIDs
What are GUIDs
A GUID (Globally Unique Identifier) is a unique identifier that occurs only once. In Anno it is a sequence of up to 11 numbers long, most of them should be 7 characters long. With the help of these GUIDs, everything in the game files can be uniquely named and clearly assigned by the game itself. Not everyone can be called Bob ;)
For modders these GUIDs are important for the same reason: With these GUIDs the ModLoader knows where to make which changes. And based on these GUIDs the modder can find any context in the game files by simply shimmying from GUID to GUID.
GUIDs in the assets.xml
Imagine, you are sitting in an airplane, having a good conversation with your seat neighbor about Anno, and you have just forgotten how to get the item "Feras Alsarami, Master of Hypnosis". Horror scenario, no question, but we just want to imagine it theoretically ;)Of course you don't have an AssetViewer at hand, but the well versed modder always has his files with him and can show us how to get this information out. That's good, because that's the way to find most of the connections.
But before we dive into the assets.xml, let's wet our feet in the texts_german.xml. You can find the file in the unzipped game files under the path data\config\gui\. Everything that has a name, all texts spoken or displayed in the game can be found in the local language in this file, and there we simply look for the name of the item to find out its GUID. Then we should find this here:
<Text>
  <GUID>192450</GUID>
  <Text>Feras Alsarami, Meister der Hypnose</Text>
</Text>With this GUID we now dive into the assets.xml.
Caution:
The assets.xml is the core of the game settings and even if we have only one copy of it after unpacking the dataX.rda: Be careful. The assets.xml may contain only simple text, but it is much more than 2 million lines of text.
Not every program can handle this. I recommend Visual Studio code from Microsoft with the extension XML Tools, but there are several.
If we look for the GUID of the item (192450), we find the item declaration itself as well as all links, mostly asset pools. And now comes the nasty part: To find out how to get feras, we have to check every time we mention the item whether it is or could be a way to get the item.
This is done the same way as for the item: We take the GUID of the pool and look where this pool is linked in the assets.xml. If you are unlucky, you have to go through several asset pools to see that you can buy the item from Eli. If you are lucky, the way is sometimes faster, like with the feras for example with this possibility to get the item:
<Asset>
  <Template>RewardPool</Template>
  <Values>
    <Standard>
      <GUID>193870</GUID>
      <Name>Palace Replacement Specialists Pool</Name>
      <IconFilename>data/ui/2kimages/main/3dicons/specialists/systemic/icon_well_dressed_106.png</IconFilename>
    </Standard>
    <RewardPool>
      <ItemsPool>
        <Item>
          <ItemLink>192440</ItemLink>
        </Item>
        <Item>
          <ItemLink>192450</ItemLink>    <= Die GUID kennen wir doch ^^
        </Item>
        <Item>
          <ItemLink>190719</ItemLink>
        </Item>
        <Item>
          <ItemLink>190668</ItemLink>
        </Item>
        <Item>
          <ItemLink>190684</ItemLink>
        </Item>
        <Item>
          <ItemLink>191377</ItemLink>
        </Item>Agrandir Codebox
Here you can see that the search can sometimes be finished quite fast. Feras is linked directly in this pool and the pool is quite clearly named. The names here in the assets.xml are not of much value, and are probably only meant to give you an overview.
Custom GUIDs
If you really want to start modding, you will get to the point where you have to assign your own GUIDs. Be it for new buildings you bring into the game, or clone an existing one. For new civil levels or new texts. You need a GUID for everything. But what if you assign a GUID that already exists?
Of course this is not good ;)
The actual effects can range from nothing to a CTD (Crash to Desktop). This was sometimes a problem for modders until mid 2020. Many of them talked to each other to avoid using the same GUIDS making mods not compatible with each other, but here and there we had a few clashed. At the end of June Ubisoft announced:
For our modders - a safe GUID range
As you know, we continue to being impressed and appreciate the work some our community members put into creating mods for Anno 1800. To make it a little bit easier for you when it comes to adjusting your mods to new Game Updates, we now reserved the GUID range 1337471142 to 2147483647 just for you. This range is "safe" and not used by us.
In the name of all modders for it once again many thanks to Mainz.
Safe GUID range
Initiated by Lady Meridonia and further developed by Taubenangriff, a list has been created on Github in which every modder can save his GUID range. The list will never be complete, but contributes greatly to the fact that the modders do not get in each other's way.
You can finde the list there: GitHub.
The list is self-managing, anyone can enter themselves. How to do it is under the table.
Search the locas
As already announced in the GUIDs section, you now have the possibility to search for text in your own language to look for the specific GUID you need. On the other hand you can also enter the GUID directly to see what it corresponds to in other languages.
Search for default Values in the assets
Here you can look up the default values of each asset. Note that values from the templates can also be inherited.
You can search for GUIDs, or for characters that appear in the name of the asset or in the name of the template (if none is selected in the second field). The search phrase must be at least 3 characters long.
Thx to Jakob the clean-up of the assets.xml.
Die Assets-Bibliothek
How do you do modding?
Imagine your game like this (very simplified):
Assets + Graphics → Binary (Anno1800.exe) → What you can do and see on screen
You cannot modify the Binary. What you can do, is feeding it new or changed assets and graphics that the game can interpret.
That means, you have to stick to the rules, only if you write Code that can be parsed by the game, it will do what you want it to do.
What skills are needed to get started?
First, no, you do not need to be a programmer, although this is always a plus.
If you aren‘t a programmer, it is strongly recommended you familiarize yourself with the concepts of data types, variables, arrays, inheritance as well as (generic) dictionaries and vectors/lists.
You don‘t need to write actual code with it, but understanding those is quite valuable.
Most of the game files are using the XML scripting language. I won‘t explain any XML syntax and going to assume basic XML knowledge, if you don‘t know any of this, you should read into that topic first.
You should also be or get familiar with Xpath, since this is needed for the modloader later on.
Understand the Asset Library
So, this should be the first in some kind of tutorial series about asset modding. First, I want to apologize (no, not canadian) – the start is gonna be more dry and theoretical stuff,
but you‘ll need it in order to get to the interesting parts, especially if you like to inject new functionality.
For Assets, Anno uses a few basic concepts all over again:
- Assets are actual ingame objects (like a building, a ship, or a construction menu) that are built from a template.
- Templates are Blueprints for Assets that configure defaults for values in each asset using this template, and say which properties it has.
- Properties are Containers that are directly contained by an Asset. Properties can contain Containers, but Containers cannot contain a property.
- Containers are collections of Values, vectors or other containers.
- Vectors are lists of variables or containers
- Dictionaries are like vectors, but each element gets a unique name that needs to match a hardcode the game is looking for. Because of this, the size is limited to the amount of available hardcodes.
- Values are simple variables or arrays
Note: To differentiate between the name of a value and the value itself, I will call the name „variable“ from now on.
Properties
This is the hardest to understand, but once you get it, you will have no problems understanding any templates and assets the game offers.
Properties.xml essentially consists of two parts: DefaultContainerValues and DefaultValues. Those are grouped for better overview in the dev tools, but in general you could narrow it down to those two.
DefaultContainerValues defines which Containers a property uses, define Variables inside those containers, in case the container contains a vector or dictionary,
the content type of this data structure is given.
DefaultValues defines the variables that are contained directly inside the property and inherit the Containers from DefaultContainerValues.
As the names might suggest, setting the a value for a variable inside the properties.xml sets this value as default for this variable in every asset using this property.
You can change the values for variables, but you cannot tell the game to load other containers or variables, since this is a direct export of what the game expects!
Note that on rare occasions, some of the export is incomplete, in that case every variable is given inside assets.xml.
If you need any information on what you can do with each property, this is where you should look. The following is a shortened version of the „IrrigationConfig“ property, along with some comments.
<Properties>
    <DefaultContainerValues>
        <Building>
            <IrrigationConfig>
                <IrrigationSpreading>
                    <!-- Variable in Container in Property: Standardwert für Variable am selben Ort definiert -->
                    <IrrigationSpreadRule>MaxAbsDist</IrrigationSpreadRule>
                </IrrigationSpreading>
                <!-- IrrigationIslandSeeds ist ein Container, der einen Vector enthält -->
                <IrrigationIslandSeeds>
                    <!-- Island ist der ContentType dieses Vectors-->
                    <Island>0</Island>
                </IrrigationIslandSeeds>
            </IrrigationConfig>
        </Building>
    </DefaultContainerValues>
    <DefaultValues>
        <IrrigationConfig>
            <!-- Container werden vererbt -->
            <IrrigationSpreading />
            <IrrigationIslandSeeds />
            <!-- Variable direkt in der Property: Standardwert für Variable wird in DefaultValues definiert-->
            <StaticIrrigationRandomizerFrequency>2</StaticIrrigationRandomizerFrequency>
        </IrrigationConfig>
    </DefaultValues>
</Properties>Agrandir Codebox
In case a container A contains another container B, B is defined in ContainerValues and then inherited by A. If B contains Variables, those are defined in the same spot.
The following example shows the DefaultContainerValues for the IrrigationConfig property:
<Properties>
    <DefaultContainerValues>
        <IrrigationConfig>
            <VisualsAndEffects>
                <!-- Vegetation-Container wird definiert-->
                <ContainerValues>
                    <Vegetation>
                        <!-- Variablen in Container in Container in Property: Standartwerte für Variablen werden am selben Ort definiert -->
                        <FadingSpeed>0.05</FadingSpeed>
                        <BlurRadius>1</BlurRadius>
                    </Vegetation>
                </ContainerValues>
                <!-- Der Vegetation Container wird an VisualsAndEffects vererbt. -->
                <!-- Wichtig: In unserem Fall ist Vegetation nur ein einfacher Container -->
                <!-- es könnte aber auch der ContentType eines Vectors oder Dictionaries sein. -->
                <Vegetation />
            </VisualsAndEffects>
        </IrrigationConfig>
    </DefaultContainerValues>
    <DefaultValues>
        <IrrigationConfig />
    </DefaultValues>
</Properties>Agrandir Codebox
The full definition of our IrrigationConfig should look something like this:
<Properties>
    <DefaultContainerValues>
        <Building>
            <IrrigationConfig>
                <IrrigationSpreading>
                    <IrrigationSpreadRule>MaxAbsDist</IrrigationSpreadRule>
                </IrrigationSpreading>
                <IrrigationIslandSeeds>
                    <Island>0</Island>
                </IrrigationIslandSeeds>
                <VisualsAndEffects>
                    <ContainerValues>
                        <Vegetation>
                            <FadingSpeed>0.05</FadingSpeed>
                            <BlurRadius>1</BlurRadius>
                        </Vegetation>
                    </ContainerValues>
                    <Vegetation />
                </VisualsAndEffects>
            </IrrigationConfig>
        </Building>
    </DefaultContainerValues>
    <DefaultValues>
        <IrrigationConfig>
            <IrrigationSpreading />
            <IrrigationIslandSeeds />
            <VisualsAndEffects />
            <StaticIrrigationRandomizerFrequency>2</StaticIrrigationRandomizerFrequency>
        </IrrigationConfig>
    </DefaultValues>
</Properties>Agrandir Codebox
Data Types
The following Data Types are used for variables:
- int → mostly signed 16 or 32 bit integers
- float → american style 0.1305
- boolean → noted as 0 or 1
- String → without quotation marks
- Hardcode → used like a String, however only predefined names are accepted.
You need to figure out the data type of a Variable by yourself by taking a look at how it‘s used inside all three files. Also, there is no full list of hard codes that can be used. Previous games like 2205 had a datasets.xml which contained this information, however this is not the case with 1800, and it would be a great thing if something like this could be published in the future by Ubisoft.
Templates
A template consists of a unique name as well as a collection of properties that objects using this template have.
The same as properties, Groups are only there for overview in Dev Tools and essentially are irrelevant
i.e. take a look at the Template „UnlockableAsset“
<Templates>
    <Template>
        <Name>UnlockableAsset</Name>
        <Properties>
            <Standard />
            <Locked />
        </Properties>
    </Template>
</Templates>This one only has the Standard and the Locked Property.
Templates can define default values for any variable inside a property, which is then applied for all assets using this template, and that‘s essentially it.
Inheritance
At this point we should take a quick look at inheritance in general.
This is our custom template „CustomIrrigationConfig“.
<Templates>
    <Template>
        <Name>CustomIrrigationConfig</Name>
        <Properties>
            <Standard />
            <IrrigationConfig />
        </Properties>
    </Template>
</Templates>As you might recall from earlier, the Property has a default Value of 2 for StaticIrrigationRandomizerFrequency. We now want to change that to 5, but keep the rest.
For this, we do not have to copy+paste everything, we just have to change that variable and leave the rest out.
In templates and assets, containers are automatically inherited, however properties are not (keep this in mind!). We could also manually inherit containers, but we do not have to.
<Templates>
    <Template>
        <Name>CustomIrrigationConfig</Name>
        <Properties>
            <Standard />
            <IrrigationConfig>
                <StaticIrrigationRandomizerFrequency>5</StaticIrrigationRandomizerFrequency>
            </IrrigationConfig>
        </Properties>
    </Template>
</Templates>Now, we also want to change the FadingSpeed inside VisualsAndEffects. For that, we have to first manually inherit VisualsAndEffects, inside that manually inherit Vegetation, and inside that override the FadingSpeed.
<Templates>
    <Template>
        <Name>CustomIrrigationConfig</Name>
        <Properties>
            <Standard />
            <IrrigationConfig>
                <VisualsAndEffects>
                    <Vegetation>
                        <FadingSpeed>0.05</FadingSpeed>
                    </Vegetation>
                </VisualsAndEffects>
                <StaticIrrigationRandomizerFrequency>5</StaticIrrigationRandomizerFrequency>
            </IrrigationConfig>
        </Properties>
    </Template>
</Templates>For dictionaries, the unique names are treated like containers, for vectors, inheritance has to be made manually. For this, see here (Only german).
Assets
Now let‘s get to creating actual ingame objects. Each Asset has the Standard property, which defines the GUID of an object.
An Asset consists of a Template and Values. To create our asset, we start of by specifing the template. In our case we will create a simple building from the template FactoryBuilding7. For Values, we will note down the exact properties that this Template has, without any Variables or Containers.
<Asset>
    <Template>FactoryBuilding</Template>
    <Values>
        <Standard />
        <Building />
        <Blocking />
        <Cost />
        <Object />
        <Mesh />
        <Selection />
        <Text />
        <Constructable />
        <Locked />
        <SoundEmitter />
        <FeedbackController />
        <Infolayer />
        <UpgradeList />
        <Factory7 />
        <FactoryBase />
        <LogisticNode />
        <AmbientMoodProvider />
        <Maintenance />
        <Attackable />
        <Pausable />
        <IncidentInfectable />
        <Industrializable />
        <Culture />
        <QuestObject />
        <Electrifiable />
    </Values>
</Asset>Agrandir Codebox
Then we‘ll do the Values.
I have decided to allocate the GUID 1337733142 for my building. This is now added in the Standard property as a Variable.
For better overview, we can set a Name inside Standard too, though this is only for us. More about GUIDs you can find here.
Theoretically, we now have a fully functional factory. Except it produces nothing from nothing, does not cost any workforce or credits and does not have construction cost.
So let‘s assign those things to our factory.
We will make a factory that produces canned food from zinc and potatoes, and just because we can, we will do it in the new world with Obreros.
<Asset>
    <Template>FactoryBuilding</Template>
    <Values>
        <Standard>
            <GUID>1337733142</GUID>
            <Name>Canned Food Factory 02 - Variant uses Potatoes and Zinc</Name>
        </Standard>
        <Building>
            <!-- Gebäude für Colony01 (Südamerika) -->
            <AssociatedRegions>Colony01</AssociatedRegions>
            <!-- Zufällige Rotation beim bauen -->
            <BuildModeRandomRotation>90</BuildModeRandomRotation>
        </Building>
        <Blocking>
            <!-- Radius in Feldern, in dem Gras versteckt wird, wenn das Gebäude gebaut wird-->
            <HidePropsRadius>0</HidePropsRadius>
            <DeletePropsRadius>0</DeletePropsRadius>
        </Blocking>
        <Cost>
            <Costs>
                <Item>
                    <!-- Referenziert Geld -->
                    <Ingredient>1010017</Ingredient>
                    <Amount>10000</Amount>
                </Item>
                <Item>
                    <!-- Referenziert Holz -->
                    <Ingredient>1010196</Ingredient>
                    <Amount>50</Amount>
                </Item>
                <Item>
                    <!-- Referenziert Ziegel -->
                    <Ingredient>1010205</Ingredient>
                    <Amount>30</Amount>
                </Item>
                <Item>
                    <Ingredient>1010218</Ingredient>
                </Item>
                <Item>
                    <Ingredient>1010207</Ingredient>
                </Item>
                <Item>
                    <Ingredient>1010202</Ingredient>
                </Item>
            </Costs>
        </Cost>
        <Object />
        <Mesh />
        <Selection>
            <!-- Hardcode, der den Participant (Charakter) im Gebäudemenü angibt. -->
            <!-- in unserem Fall ist es die Obrera -->
            <ParticipantMessageArcheType>SA_Resident_tier02_atWork</ParticipantMessageArcheType>
        </Selection>
        <Text />
        <Constructable />
        <Locked />
        <SoundEmitter />
        <FeedbackController />
        <Infolayer />
        <UpgradeList />
        <Factory7 />
        <FactoryBase>
            <FactoryInputs>
                <Item>
                    <!-- Product referenziert die GUID von Kartoffeln -->
                    <Product>1010195</Product>
                    <Amount>1</Amount>
                    <!-- Internes Kartoffel-Lager -->
                    <StorageAmount>6</StorageAmount>
                </Item>
                <Item>
                    <!-- Product referenziert die GUID von Zink-->
                    <Product>1010229</Product>
                    <Amount>1</Amount>
                    <!-- Internes Zink-Lager -->
                    <StorageAmount>3</StorageAmount>
                </Item>
            </FactoryInputs>
            <FactoryOutputs>
                <Item>
                    <!-- Product referenziert GUID von Dosenfutter-->
                    <Product>1010217</Product>
                    <Amount>1</Amount>
                    <!-- Internes Dosenfutter-Lager -->
                    <StorageAmount>4</StorageAmount>
                </Item>
            </FactoryOutputs>
            <!-- Zeit in sekunden, in der 1t produziert wird -->
            <CycleTime>45</CycleTime>
        </FactoryBase>
        <LogisticNode />
        <AmbientMoodProvider />
        <Maintenance>
            <!-- Unterhaltskosten -->
            <Maintenances>
                <Item>
                    <!-- Geld -->
                    <Product>1010017</Product>
                    <Amount>40</Amount>
                    <InactiveAmount>20</InactiveAmount>
                </Item>
                <Item>
                    <!-- Obrero Arbeitskraft -->
                    <Product>1010367</Product>
                    <Amount>25</Amount>
                </Item>
            </Maintenances>
        </Maintenance>
        <Attackable />
        <Pausable />
        <IncidentInfectable />
        <Industrializable>
            <!-- Boost durch Strom unmöglich machen, da es in der neuen Welt keine Kraftwerke gibt. -->
            <BoostedByIndustrialization>0</BoostedByIndustrialization>
        </Industrializable>
        <Culture />
        <QuestObject />
        <Electrifiable />
    </Values>
</Asset>Agrandir Codebox
One thing is missing now – the visuals. Anno more or less seperates graphics from logic. Everything graphics-related is stored in other files, we simply reference their path, starting from the game‘s „data“ folder.
<Asset>
    <Template>FactoryBuilding7</Template>
    <Values>
        <Standard>
            <GUID>1337733142</GUID>
            <Name>Canned Food Factory 02 - Variant uses Potatoes and Zinc</Name>
            <IconFilename>data/ui/2kimages/main/3dicons/icon_canned_goulash.png</IconFilename>
        </Standard>
        <Building>
            <AssociatedRegions>Colony01</AssociatedRegions>
            <BuildModeRandomRotation>90</BuildModeRandomRotation>
        </Building>
        <Blocking>
            <HidePropsRadius>0</HidePropsRadius>
            <DeletePropsRadius>0</DeletePropsRadius>
        </Blocking>
        <Cost>
            <Costs>
                <Item>
                    <Ingredient>1010017</Ingredient>
                    <Amount>10000</Amount>
                </Item>
                <Item>
                    <Ingredient>1010196</Ingredient>
                    <Amount>50</Amount>
                </Item>
                <Item>
                    <Ingredient>1010205</Ingredient>
                    <Amount>30</Amount>
                </Item>
                <Item>
                    <Ingredient>1010218</Ingredient>
                </Item>
                <Item>
                    <Ingredient>1010207</Ingredient>
                </Item>
                <Item>
                    <Ingredient>1010202</Ingredient>
                </Item>
            </Costs>
        </Cost>
        <Object>
            <Variations>
                <!-- Mehrere .cfg bedeuten, dass man mit Shift+V durchschalten kann -->
                <Item>
                    <Filename>data/graphics/buildings/production/workshop_colony01_01/workshop_colony01_01.cfg</Filename>
                </Item>
            </Variations>
        </Object>
        <Mesh />
        <Selection>
            <ParticipantMessageArcheType>SA_Resident_tier02_atWork</ParticipantMessageArcheType>
        </Selection>
        <Text />
        <Constructable />
        <Locked />
        <SoundEmitter />
        <FeedbackController />
        <Infolayer />
        <UpgradeList />
        <Factory7 />
        <FactoryBase>
            <FactoryInputs>
                <Item>
                    <Product>1010195</Product>
                    <Amount>1</Amount>
                    <StorageAmount>6</StorageAmount>
                </Item>
                <Item>
                    <Product>1010229</Product>
                    <Amount>1</Amount>
                    <StorageAmount>3</StorageAmount>
                </Item>
            </FactoryInputs>
            <FactoryOutputs>
                <Item>
                    <Product>1010217</Product>
                    <Amount>1</Amount>
                    <StorageAmount>4</StorageAmount>
                </Item>
            </FactoryOutputs>
            <CycleTime>45</CycleTime>
        </FactoryBase>
        <LogisticNode />
        <AmbientMoodProvider />
        <Maintenance>
            <Maintenances>
                <Item>
                    <Product>1010017</Product>
                    <Amount>40</Amount>
                    <InactiveAmount>20</InactiveAmount>
                </Item>
                <Item>
                    <Product>1010367</Product>
                    <Amount>25</Amount>
                </Item>
            </Maintenances>
        </Maintenance>
        <Attackable />
        <Pausable />
        <IncidentInfectable />
        <Industrializable>
            <BoostedByIndustrialization>0</BoostedByIndustrialization>
        </Industrializable>
        <Culture />
        <QuestObject />
        <Electrifiable />
    </Values>
</Asset>Agrandir Codebox
Take a look at the example again. You should pay close attention to Building, Maintenance, Object and FactoryBase Containers, you will most likely encounter them many times.
We now have a fully functional asset that we could add ingame, that Anno will interpret correctly.
Déclencheur
Intro
Übersetzung: Wiesl
<Asset>
  <Template>Trigger</Template>
  <Values>
    <Standard />
    <Trigger>
      <TriggerCondition>
        //hier wird eine condition erwartet
      </TriggerCondition>
      <TriggerActions>
        <Item>
          //hier wird eine Action erwartet
        </Item>
      </TriggerAction>
    </Trigger>
    <TriggerSetup />
  </Values>
</Asset>A very simple but powerful concept, which exists since Anno 2205, are triggers.
Discovered by Fishboss in summer 2019, the unlock system is based on triggerable events, that are triggered as soon as their condition is met. Once triggered, they unlock everything they are supposed to unlock and stay triggered.
So a trigger implements the following concept: If the condition is met, it executes one or more actions.
There are a number of predefined conditions and actions in the templates.xml You are limited to these (there is also old code from Anno 2205) - but they can do a lot and are very versatile. These conditions and actions can be combined arbitrarily. For example, you can link the activation of the heavy AI in the AI shipyard to the construction of a building (e.g. an embassy) instead of a reached population. The actions of a trigger are triggered in their order.
Registering triggers
Übersetzung: Wiesl
Imagine the following problem: I wrote a trigger to unlock the bank at 1 engineer and triggered it, unlocked the bank and made the residents happy. But in retrospect I realize that I also want to have the clubhouse from 1 engineer, so I add it to my trigger. If I would reload my savegame, I will notice that it is not activated at all, although I already have 1 engineer?
Why is that so?
Anno manages the triggers in an internal event list, in which a trigger must first be registered. When registering the trigger, the asset is parsed and an event is created for Anno based on it. In our case: 1 engineer reached -> unlock bank. This event gets the GUID of the trigger as ID. If Event 42 is already in the event list, no more changes are made to this event, no matter if we change the trigger. If Event 42 is triggered in the event list, the game remembers this. No matter what we change now on the asset with GUID = 42, the game will not re-register it by itself.
Normally, assets with the template trigger are automatically registered the first time they are used, unless we turn it off. (see below)Then we have to re-register manually. For testing purposes, it is usually quite helpful to simply change the GUID of the asset, because Anno will then see the trigger as a new event and re-read it accordingly. For the manual registration we now have to do a few steps:
A few tricks using tiggers
Übersetzung: Wiesl
To register a trigger not automatically: under TriggerSetup you can disable the automatic registration of the trigger
<TriggerSetup>
  <AutoRegisterTrigger>0</AutoRegisterTrigger>
</TriggerSetup>Register a trigger with another trigger: Via the ActionRegisterTrigger - This works even if the trigger has already been triggered! After the new registration the trigger can be triggered again.
.<Template>ActionRegisterTrigger</Template>
<Values>
<Action />
<ActionRegisterTrigger>
<TriggerAsset>1443041</TriggerAsset>
</ActionRegisterTrigger>
</Values>Let a trigger reset itself: Via the ActionResetTrigger
<Template>ActionResetTrigger</Template>
<Values>
  <Action/>
  <ActionResetTrigger/>
</Values>Register a trigger only when a certain condition is met: This is done by a SubTrigger in the SubTriggers container. This SubTrigger must be registered under Values/Trigger.
<SubTriggers>
    <Item>
        <SubTrigger>
            <Template>AutoCreateTrigger</Template>
            <Values>
                <Trigger>
                    <TriggerCondition>
                        //Hier wird eine Condition erwartet
                    </TriggerCondition>
                </Trigger>
            </Values>
        </SubTrigger>
    </Item>
</SubTriggers>
Agrandir Codebox
A SubTrigger can also have more SubTriggers added to it, if you feel like it you can have a look at the uPlay-Club challenge "Silocon Valley", where it has been pushed to an extreme.
Substance Painter
Eigene Modelle aus Blender & Substance Painter für Anno 1800/2205 exportieren
Vorwort
Zuersteinmal Danke an Judekw der sich komplett auf sich allein gestellt die Grafikengine der 3D-Annos erschlossen hat, und an kskudlik und Cyborg für die RDM-OBJ Conversion. Ohne diese Arbeit wäre das hier gar nicht möglich.
Ich gehe jetzt davon aus, dass ich mein Modell bereits erstellt, UV Unwrapped ( beides mit Blender) habe, es in Substance Painter texturieren möchte, und es dann nach Anno bringen will. Zum Modellieren, UV-Unwrappen und Texturieren gibt es auf Youtube bessere Tutorials, als ich das geben könnte. Außerdem setzt diese Anleitung ein höheres Level an Modding-Erfahrung mit Anno 1800 voraus, wie man ein Gebäude in der .cfg richtig zusammensetzt, in der .ifo Blocker schreibt oder wie man aus einer Grafik ein baubares Gebäude macht sollten bereits bekannt sein. Darauf wird hier nicht weiter eingegangen, es geht nur darum, wie man sein Gebäude aus Blender und Substance Painter in Anno reinbekommt.
Benötigte Programme
Ich benutze für die Erstellung des Modells und das UV Unwrapping Blender, für die Texturierung Substance Painter und für die rdm conversion den rdm-obj converter von kskudlik: https://github.com/kskudlik/Anno-1800-Model-Converter/releases
Grundlagen
Ein Modell in Anno ist folgendermaßen aufgebaut:
- Ordner "maps" (von jeder Map gibt es drei Variationen, diff_0 ist doppelt so groß wie diff_1, diff_1 ist doppelt so groß wie diff_2.
- diffuse maps - Farbinformationen in RGB, Transparenzinfo in Alpha.
- normal maps - Normalmap in RG, Glowmap in B, Glossiness in Alpha.
- metallic maps - RGB Metallic, einfärben möglich. Klassisch weiß bedeutet, dass die Farbinformation der diffuse übernommen wird. Alphakanal speichert eine Ambient Occlusion Map.
- mask maps - RGB, Leuchtende Stellen bei Nacht. Weiß bedeutet, dass dieser Teil bei Nacht beleuchtet wird.
- dye maps - RGB, Weiß bedeutet, dass dieser Teil mit der Spielerfarbe eingefärbt wird (Achtung: diffuse und dye werden vermittelt!)
- height maps: Graustufen, damit lässt sich Höhenunterschied ganz gut faken. Eignet sich daher gut für Bodentexturen.
- Ordner "rdm" (hierbei steht das lod_0 für das lodlevel der Grafik (0-4, je nach Distanz, sind weniger vorhanden wird automatisch das letzte bis zum Ende genommen, man kann also auch nur eine lod0 ablegen)
- Alle benötigten Modelle im .rdm Format
- Ordner "anim" (Für uns nicht benötigt, da kein bisher geschriebener Konverter diese unterstützt)
- Alle benötigten Animationen im .rdm Format
- <model>.fc (Zuständig für die Loops des visuellen Feedbacks. Eine Art xml-Dokument, die allerdings einige Teile in Binary hat, die entweder im Hexeditor bearbeitet oder erst konvertiert werden müssen, siehe Maug-Forum ).
- <model>.cfg (Setzt Modelle zusammen, eine Art xml-Dokument, kann mit einem xml-Formatter wesentlich einfacher lesbarer gemacht werden.)
- <model>.ifo (Legt Blocking der Grafik fest, eine Art xml-Dokument, kann ebenso mit xml-Formatter lesbarer gemacht werden.)
- <model>.bfg (Global Illumination, der Unterschied, wenn diese Datei fehlt, ist marginal, daher braucht man diese nicht. Man könnte sie auch eh nicht selbst schreiben.)
Aufsetzen eines Projektes mit Substance
In Substance Painter lassen sich die Eigenschaften der Anno-Engine relativ einfach reproduzieren. Euer Projekt benötigt folgende Kanäle:
- Base Color
- Metallic
- Normal
- Glossiness
- Opacity
- Reflection (Weiß in diesem Kanal bedeutet, dass dieser Teil der Textur bei Nacht leuchtet.)
Mithilfe von Templates können in Substance Painter Projekte direkt mit diesen Kanälen erstellt werden. Dafür kann beim Erstellen eines Projektes die entsprechende Template ausgewählt werden:
Anno 1800-spezifischer Shader
Anno 1800 ist ein wenig besonders in der Hinsicht, dass es PBR mit Metal/Gloss anstatt Metal/Rough umsetzt. Der Unterschied ist nicht allzu groß, es gibt in Substance Painter aber keinen Shader, der das von Haus aus unterstützt. Insofern hier eine kleine Bearbeitung des Pbr-metal-rough-with-alpha-blending Shaders, die statt Roughness eben Glossiness benutzt. Das sollte ausreichend sein, um nicht jedes Mal erst das Spiel zu starten, um zu schauen, ob die Texturen, die in Substance perfekt wirken, denn in 1800 auch gut aussehen. Der Unterschied ist hauptsächlich das Lighting, die Materials sind aber im wesentlichen identisch.
Hier ein Vergleich:
Den Shader könnt ihr rechts einstellen, ein mit der Template aufgesetztes Projekt wird diesen automatisch verwenden.
Export der Texturen aus Substance
Substance ermöglicht nicht nur das Aufsetzen von Projekten mit den Eigenschaften wie Anno 1800, sondern auch das exportieren. Anno 1800 fasst dabei mehrere Informationen in eine Textur zusammen, im Alphakanal der Diffuse Textur steckt bspw. die Opacity Map. Für Anno 1800 sieht das ganze dann so aus:
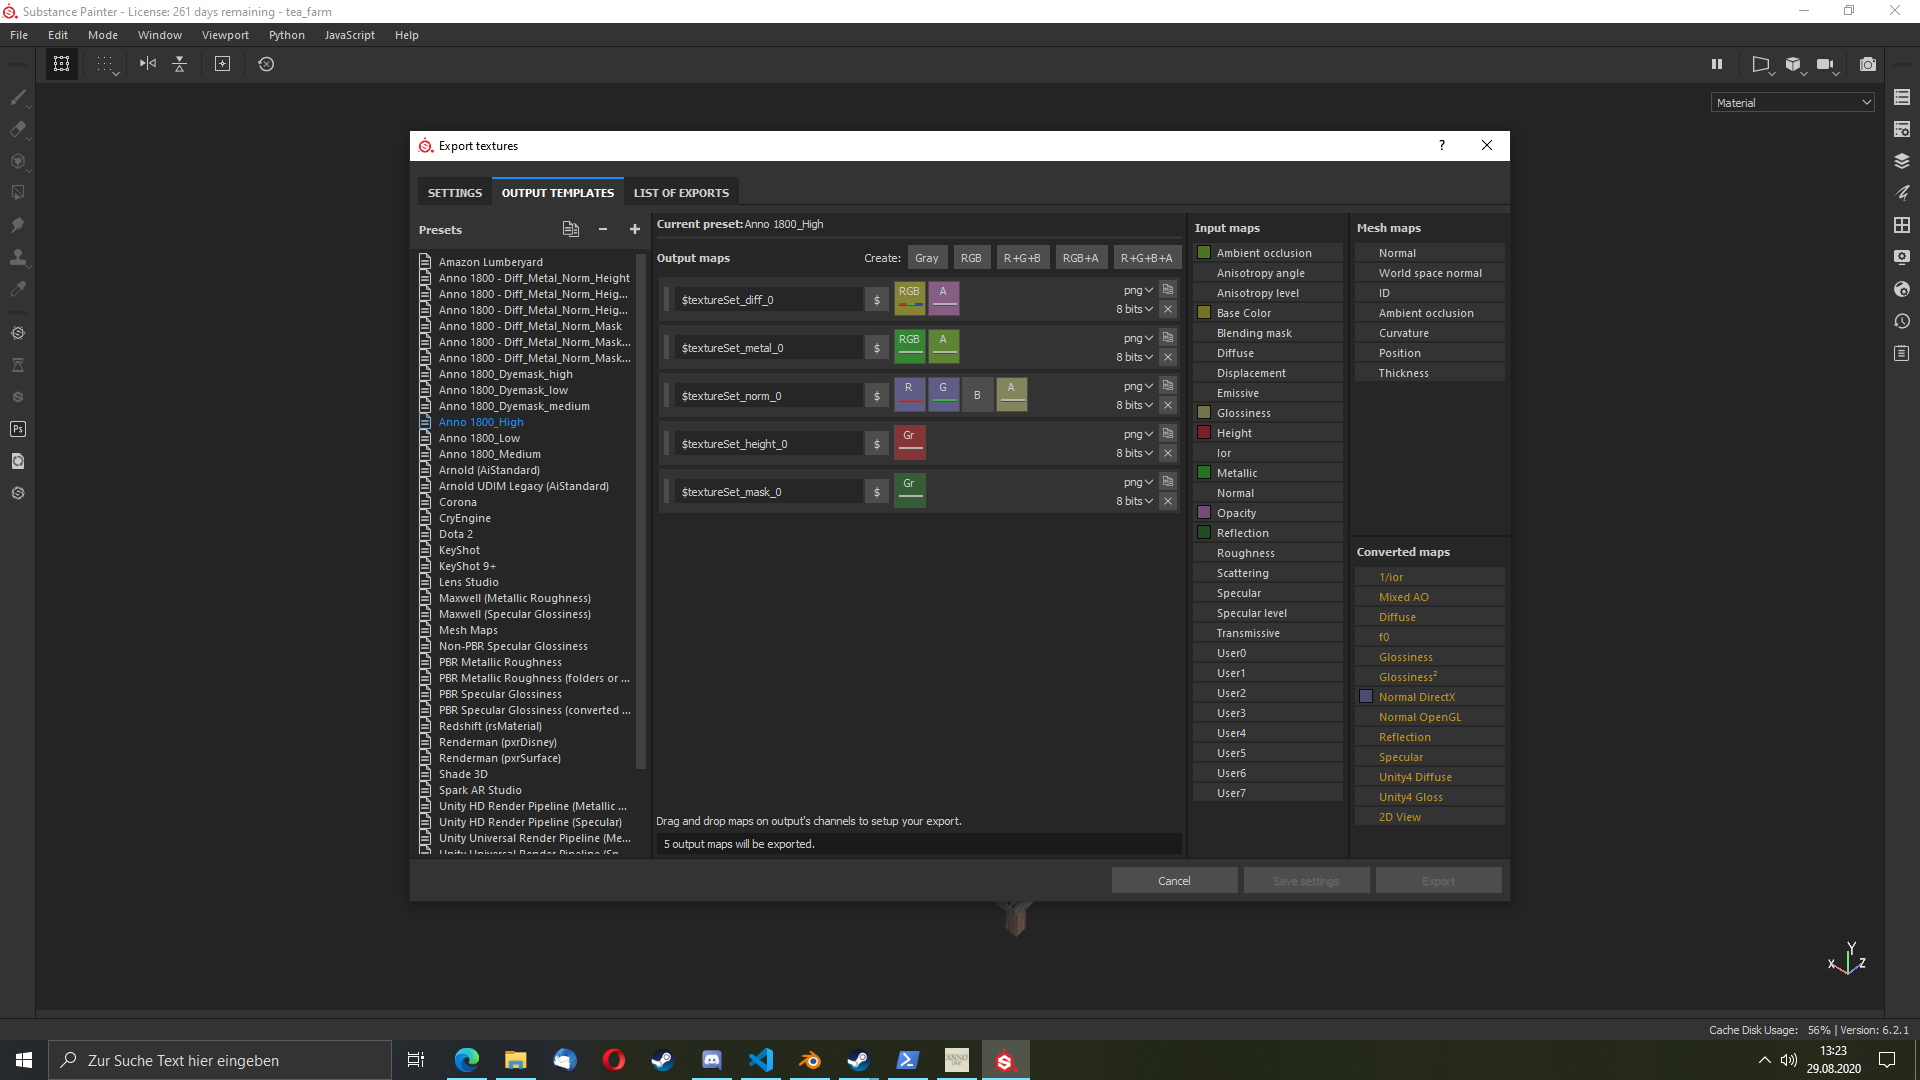
So und jetzt zum exportieren hier die Template einstellen:
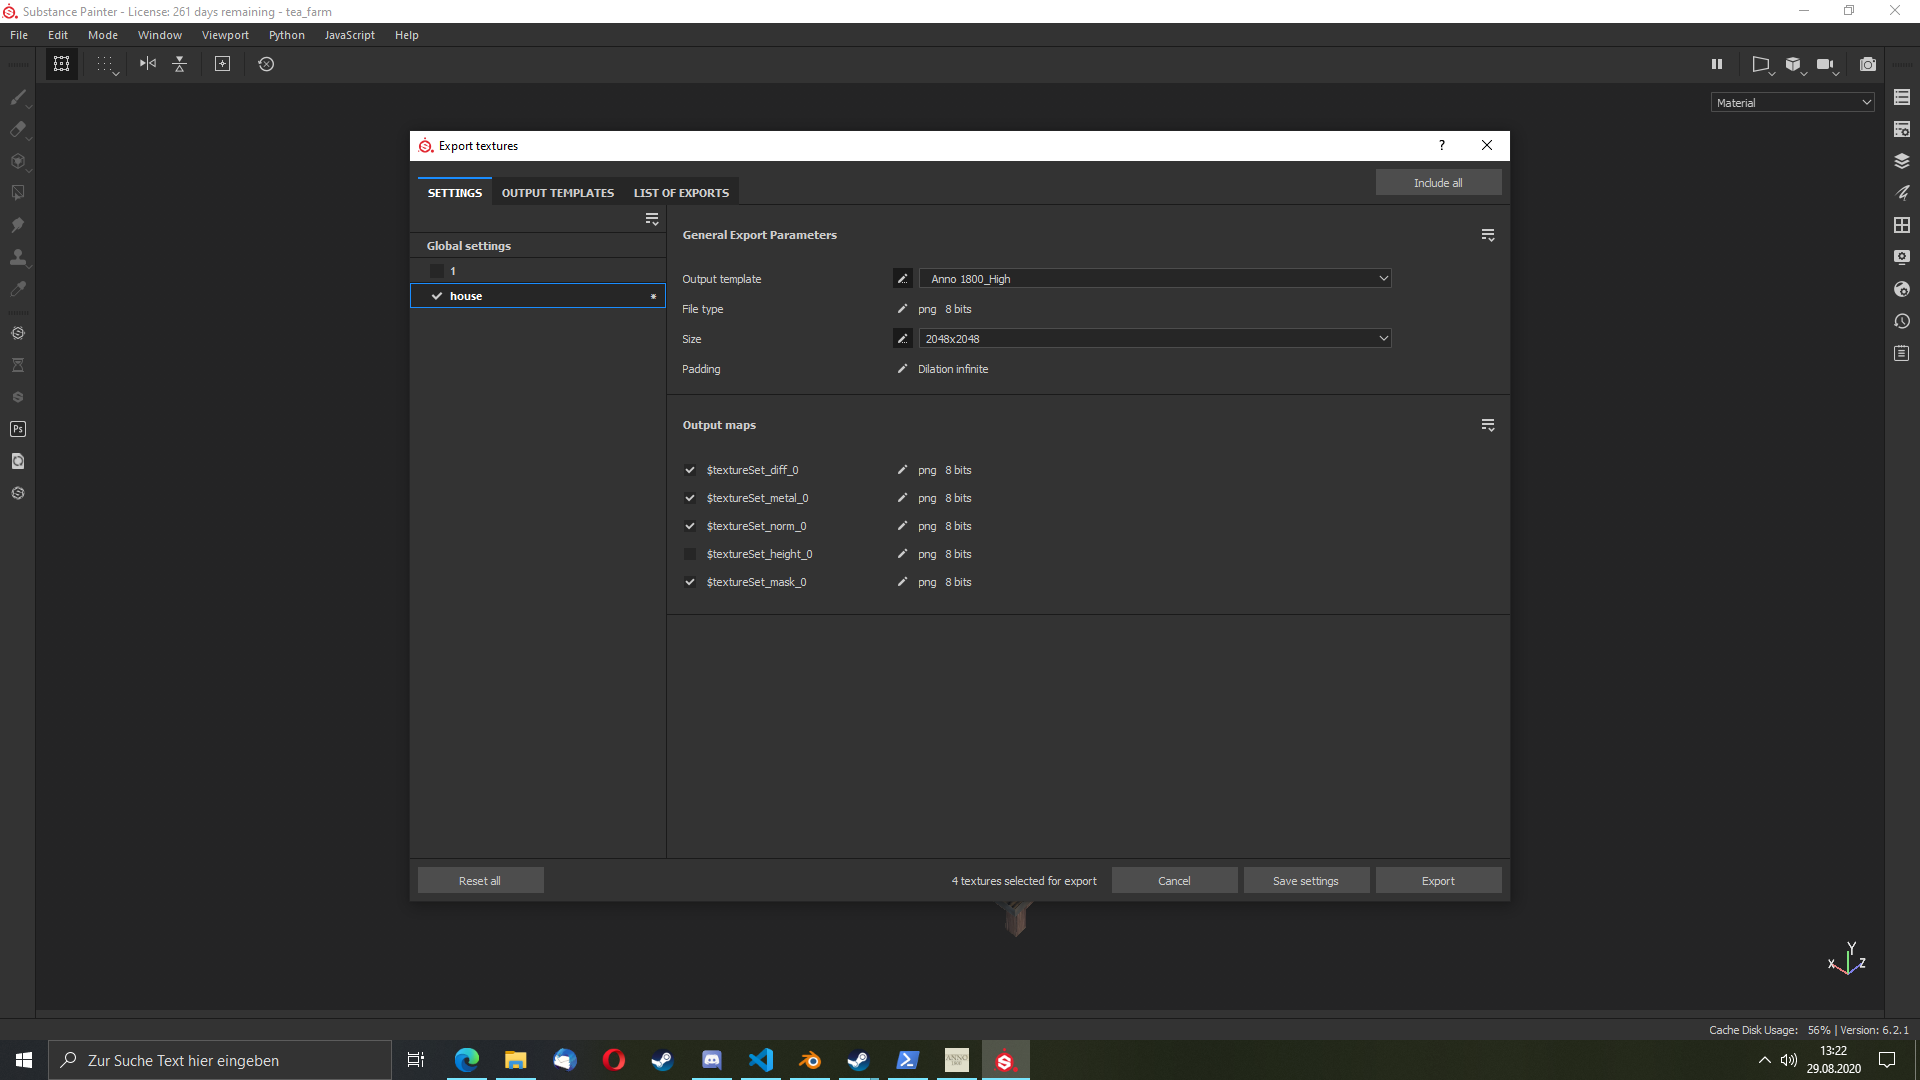
Mein Projekt ist ein ganz normales Gebäude, was keine Heightmap benötigt, daher ist dies im Export abgestellt.
Jetzt exportieren und mit der Template Medium und halber Auflösung sowie der Template Low in Viertel-Auflösung wiederholen.
Downloads
Project-Template, Export-Templates und Shader können hier heruntergeladen werden: Google Drive
Alle drei Ordner müssen unter Documents/Allegorithmic/Substance Painter/shelf abgelegt werden und suchen sich ihren Ort dann selbst.
Der letzte Schritt: Texturen nach dds konvertieren
Die Texturen müssen für Anno in .dds, BC7_UNORM Format vorliegen. Substance Painter unterstützt jedoch kein dds, weshalb man die Texturen noch konvertieren muss. Dazu kann man sie zwar einfach alle in GIMP öffnen und nach dds exportieren, am besten mit automatisiertem Texture Tool, nach dieser Anleitung.
Schneller geht manuelles Konvertieren mit texconv.exe mit folgenden Argumenten, dann wird direkt der ganze Ordner konvertiert.
-f BC7_UNORM -ft DDS -sepalpha *.pngDamit hat man dann alles was man an Texturen benötigt.
Tipps zum schreiben der cfg und ifo
Damit sind die Maps erstellt, bleiben die .cfg und die .ifo. Diese müssen vielleicht nicht von Grund auf neu erstellt werden, aber Partikel und Props, etc. müssen von Hand hinzugefügt werden.
Dabei besonders hilfreich ist, dass man für ORIENTATION_TRANSFORMS auch einfach Blender benutzen kann um bspw Props und Particles dort zu positionieren wo man das möchte. Beachtet dabei allerdings bitte, dass Blender ein Z-Up Koordinatensystem benutzt, während Anno Y-Up arbeitet. Daher müssen sämtliche y- und z- Positionswerte immer vertauscht werden beim copy+pasten.
Rotationen lassen sich sogar aus Blender direkt ablesen (Anno speichert diese im Quaternion-Format, dieses kann man in Blender auch zur Anzeige auswählen. Beachtet dabei aber, dass Y und Z getauscht werden müssen.), oder aber mit der Seite quaternions.online easy aus Euler errechnen lassen.
Für Partikel oder ähnliches lässt sich das genauso machen, einfach einen kleinen Cube an die gewünschte Position ziehen und dort die Position rauskopieren.